


")
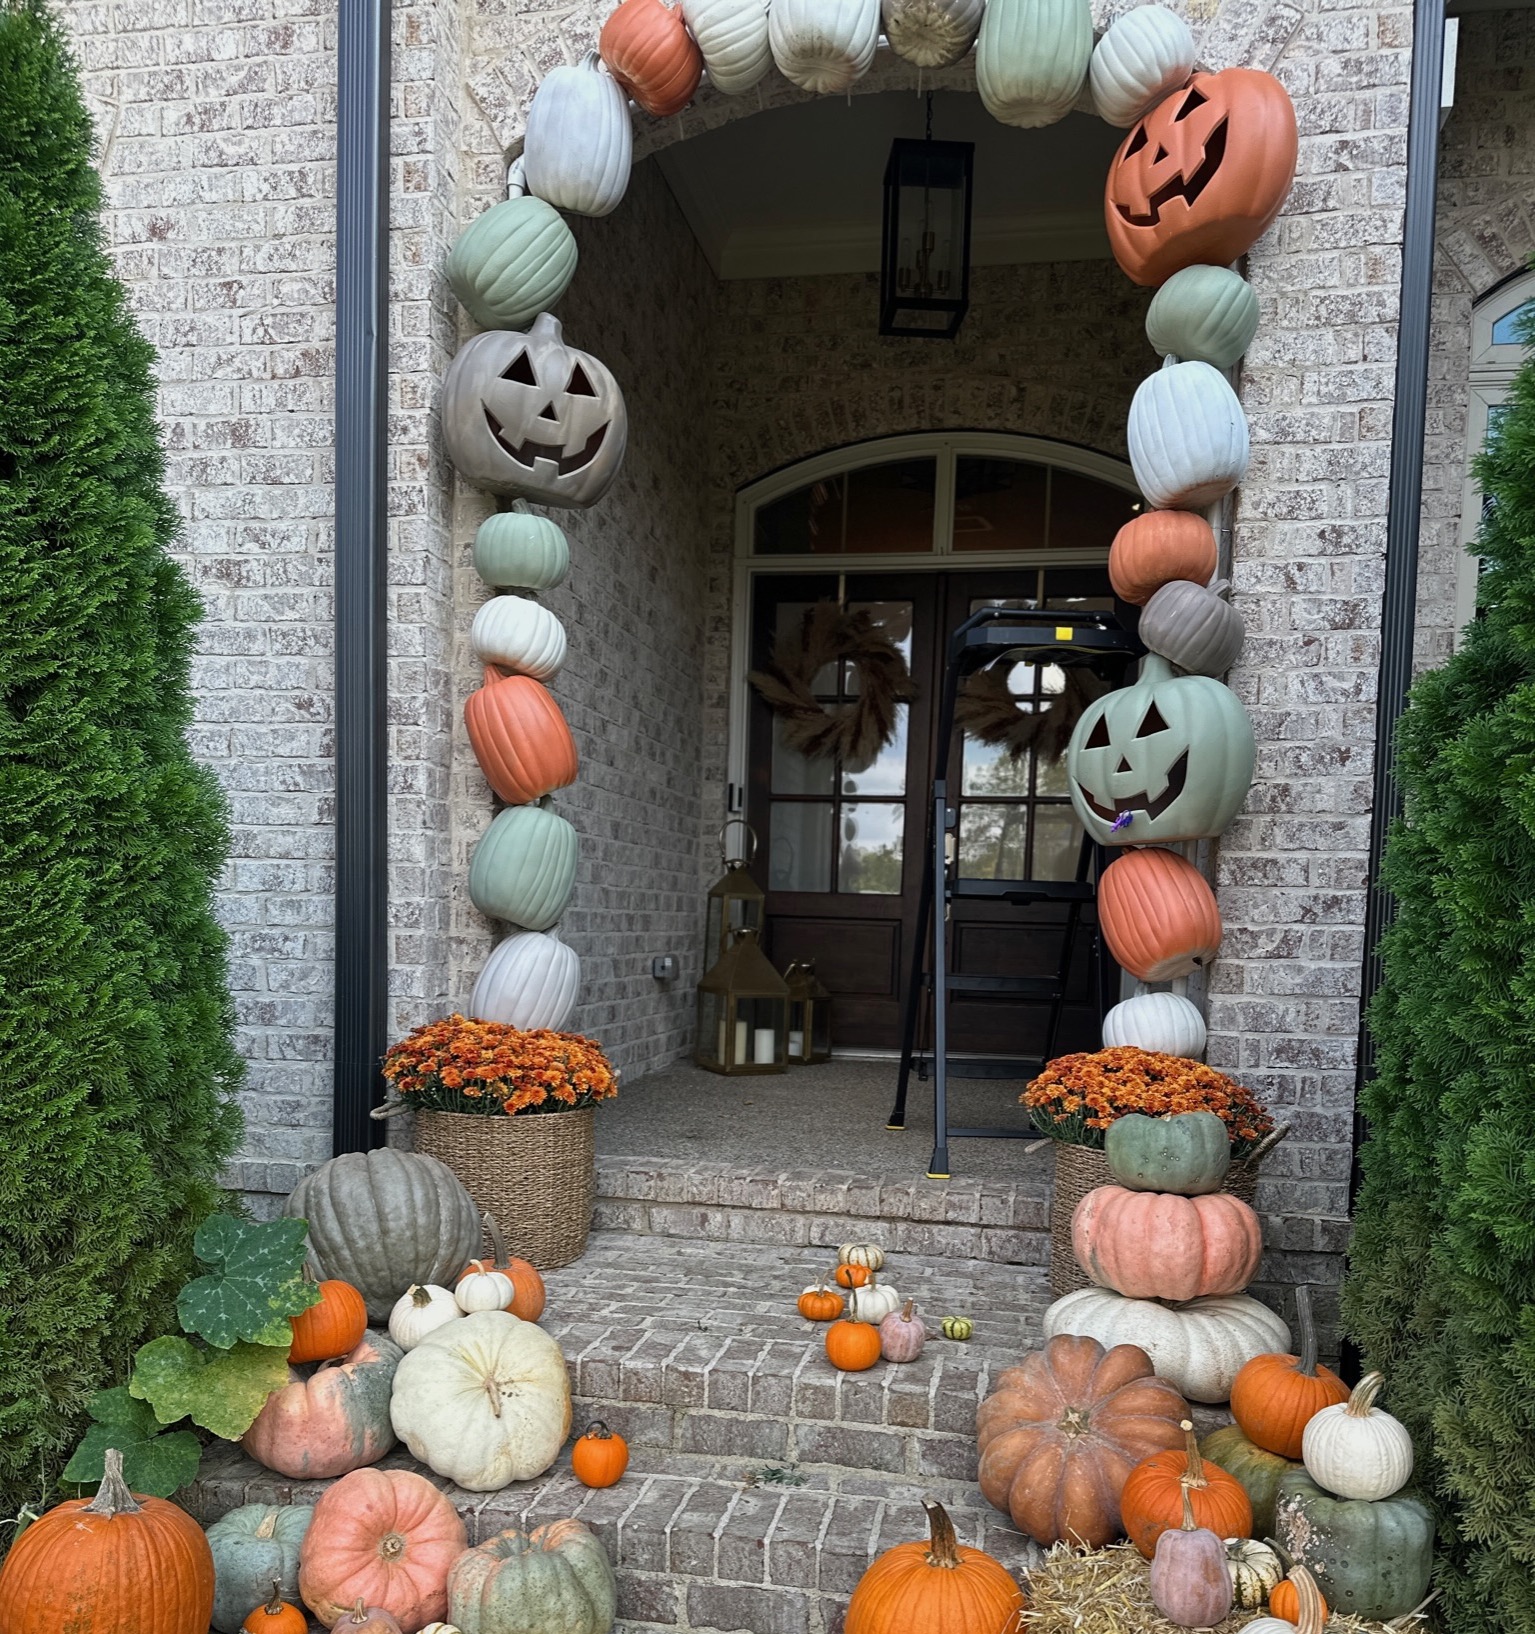
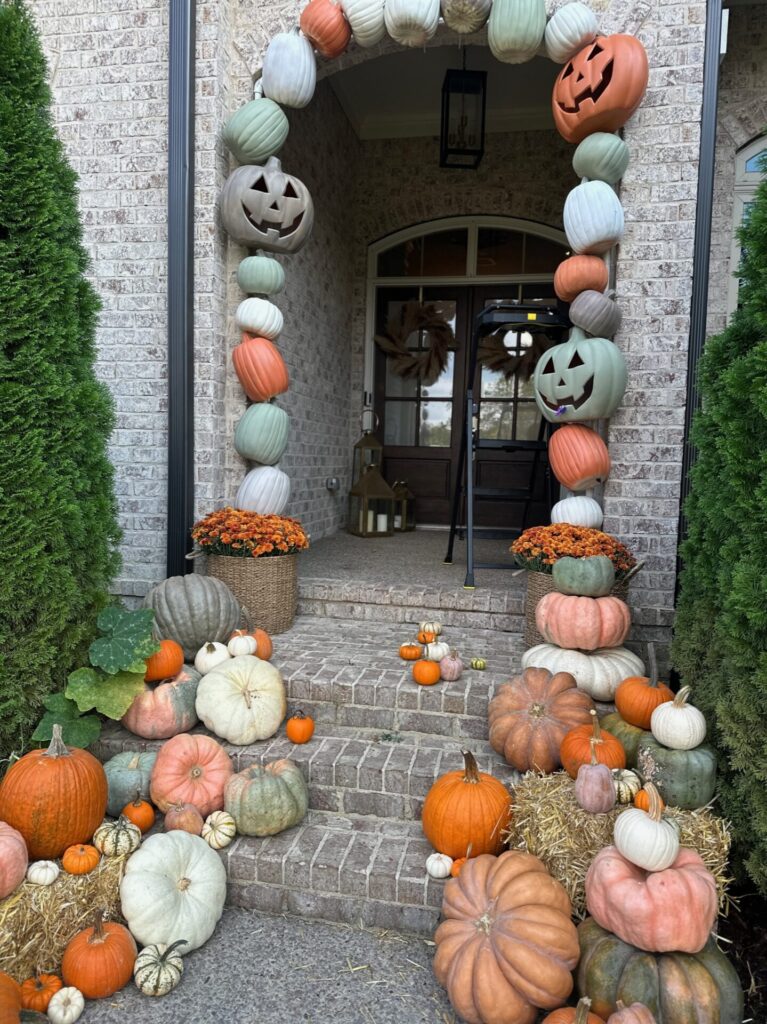
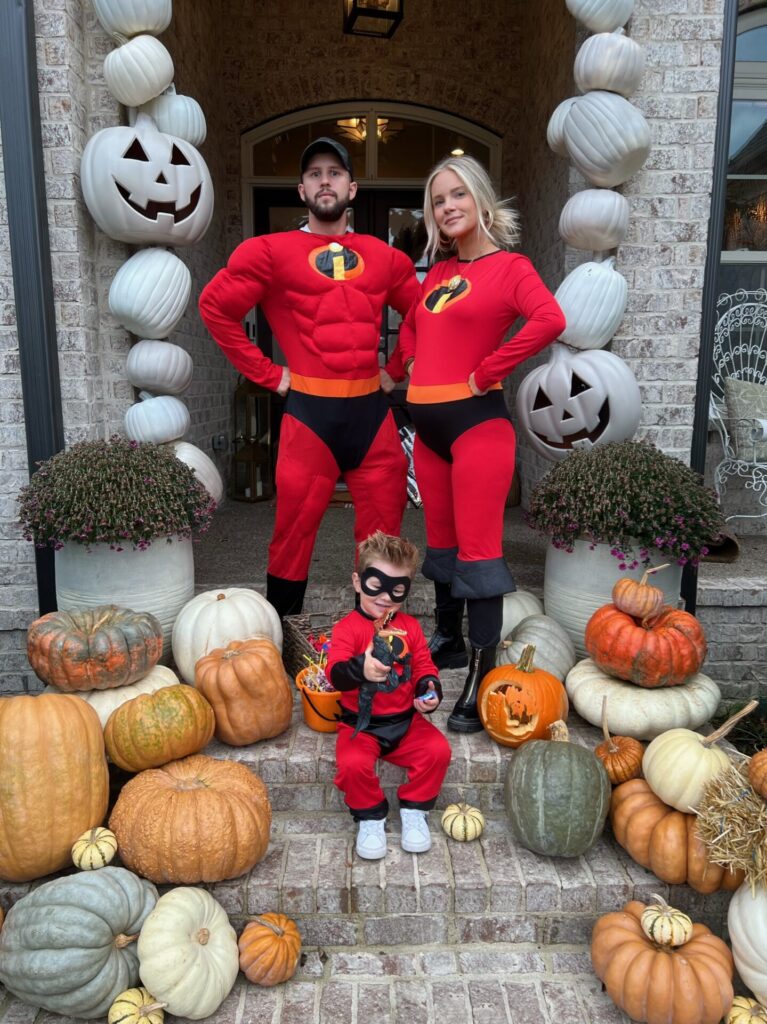
Last fall, Cam and I built a pumpkin arch for our front door. I saw them everywhere online and figured it would be a fun DIY to bring plenty of the spirit of the season into our home.
To my surprise, it was actually pretty straightforward and turned out so well; it’s the perfect addition to our home for spooky season! This was the second year building the arch and it’s a great way to kick off the fall festivities. If you’re looking for a simple way to bring all the autumn vibes to your home too, check out how we created our DIY pumpkin arch below:

Materials:
- Foam pumpkins
- Rust-Oleum spray paint in Ivory Bisque, Sand Dollar, and Smokey Beige
- Optional: Twinkle lights and tea lights
- PVC pipe
- Stainless steel screw eyelets
- Zip ties
- Hammer drill (for brick installation)
- Expansion shields
- Tarp

Step 1: Pumpkin Preparation
Start by finding foam pumpkins in different shapes and sizes. I used 25 assorted pumpkins for the arch. I bought them at Walmart. I’ve also seen some more affordable options at Hobby Lobby.
Step 2: Painting Pumpkins
Once you have your pumpkins, choose the colors that suit your taste. I used spray paint in 3 shades of white. You could also use acrylic paint. I recommend Rust-Oleum’s spray paint in Ivory Bisque, Sand Dollar, and Smokey Beige. The mix of three off-white shades creates depth and dimension in person. Feel free to get creative and explore other color combinations This year, we chose burnt orange, sage green, white, and light gray. We used shades Grey Heron, Brown Clay, and Chocolate Pretzel.
Step 3: Building the Arch
For the arch structure, use a hammer drill to create holes in the brick. Cam used expansion shields as anchors for stainless steel screw eyelets. Then connect your PVC pipe arch and secure it to the screw eyelets with zip ties. This is the base for the pumpkin arch.
Step 4: Attaching Pumpkins
Drill two holes in the back of each painted pumpkin. Use zip ties to connect the pumpkins to the PVC pipe, ensuring they build upon each other for an imperfect yet charming look. This step was the most challenging, but the results are so worth it.
Step 5: Optional Lights
If you want your Pumpkin arch to be seen at night, I recommend twinkling lights around the pumpkins. For larger pumpkins, add tea lights in the jack-o’-lanterns.
Check out my video tutorial of how I built our Neutral arch here! and our Colorful arch here


")

[…] I like the above Halloween pumpkin arch because of the colors used. It doesn’t look cartoonish or overdone. See Hunter Premo for the tutorial. […]